There has been a lot of talk about the new Eachine EV100 $99 FPV goggles recently. Many rumors, some obviously biased “they are so super mega great” reviews and “they are absolute crap” reviews. I am not going into details on this, this has been discussed on youtube and rcgroups in and out. The main critics are the very small field of view, which is indeed really really really small. But thats it for now in terms of reviewing. If you regularly read my blog you will most likely know what is going to happen next:
Let’s void some warranty!
The goggles can be taken apart quite easily. Unscrew the four acessible screws and remove the plastic faceplate. Unsnap some plastic retainers with a plastic card and take it apart:

So let’s have a closer look at the main circuit board:

You can see the green main (somewhat diversity) receiver module on the left. I will post a detailed in depth analysis of the receiver module soon. On the right side you can see some step down regulators for different voltages. The coils indicate proper step-down regulators for better effiency and longer runtime.
The back side looks more interesting:

I have no clue why they decided to remove the markings from the main chips. This is so stupid and does not help in any way. It is still possible to identify the chips, more on this later. On the left side you see the USB connector and the headphone connector. Next to the connect there is a chip labeled SL6699:

Some schematics from a chinese forum indicate that this might do some kind of audio amplification and switching between different sources. My chinese is a bit rusty so it’s hard to read the description.
The next, on most likely the most interesting chip, is a STM8S103F3 chip. This chip is made by st microelectronics, you are most likely used to their STM32F3 or F4 series that is used on many flightcontroller hardware. In terms of hacking this is probably the most interesting chip in this goggle. I am quite sure that this chip is handling the user interface. I have not (yet) connected a debugger to this chip so I have no idea if this chip has the readout protection set. Custom firmware anyone?

Let’s have a look at the biggest chip on the PCB back:

This is definitely an ALTERA FPGA (field programmable gate array). Most likely a Cyclone IV or V. There is a post on rcgroups where you can see a bit more of the chip marking. This chip is most likely responsible for the control of the display panel. I would guess it might do the signal and timing reconditioning, maybe some rescaling and most likely the OSD overlay. But this is only speculation for now. I might connect a logic analyzer to this some day but not for now.
Now comes the most hard to guess chip: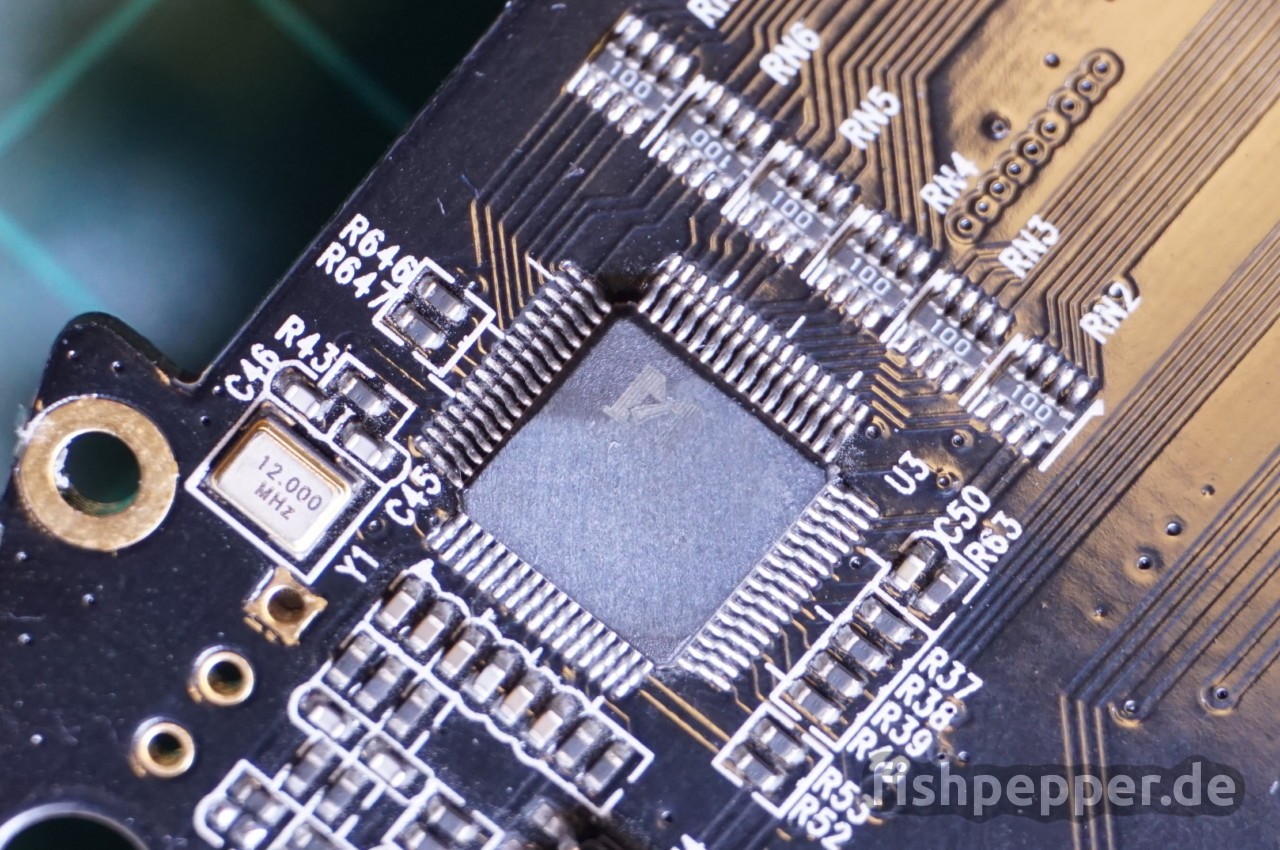
It is quite obvious that this chip is handling the incoming analog video stream and converts it to a digital signal. It connects to the FPGA with a 24bit wide data bus so RGB888 seams reasonable. I have no idea about the manufacturer. In case you recognize this logo let me know! UPDATE: It looks like this is a MST706.
Now back to one of the drawbacks of this cheap FPV goggle: I have no idea why but it seems like eachine decided not to use the proved two receiver diversity solution as everybody else does. But let’s have a look at the receiver:

Both antennas connect to the lower and upper left side of the PCB. Both signals go to a high frequency multiplexer (switch), passes a filter, passes another chip (amplifier?) and is filtered again before entering the trustworthy RTC6715 5.8GHz video receiver chip that everybody else uses as well. You can see some further passive components and some voltage regulators. The chip labeled S033 is probably a microcontroller handling the diversity switching and interfacing to the main CPU. This could be a STM8 or STM32. A detailed analysis of the receiver module will follow the next days.
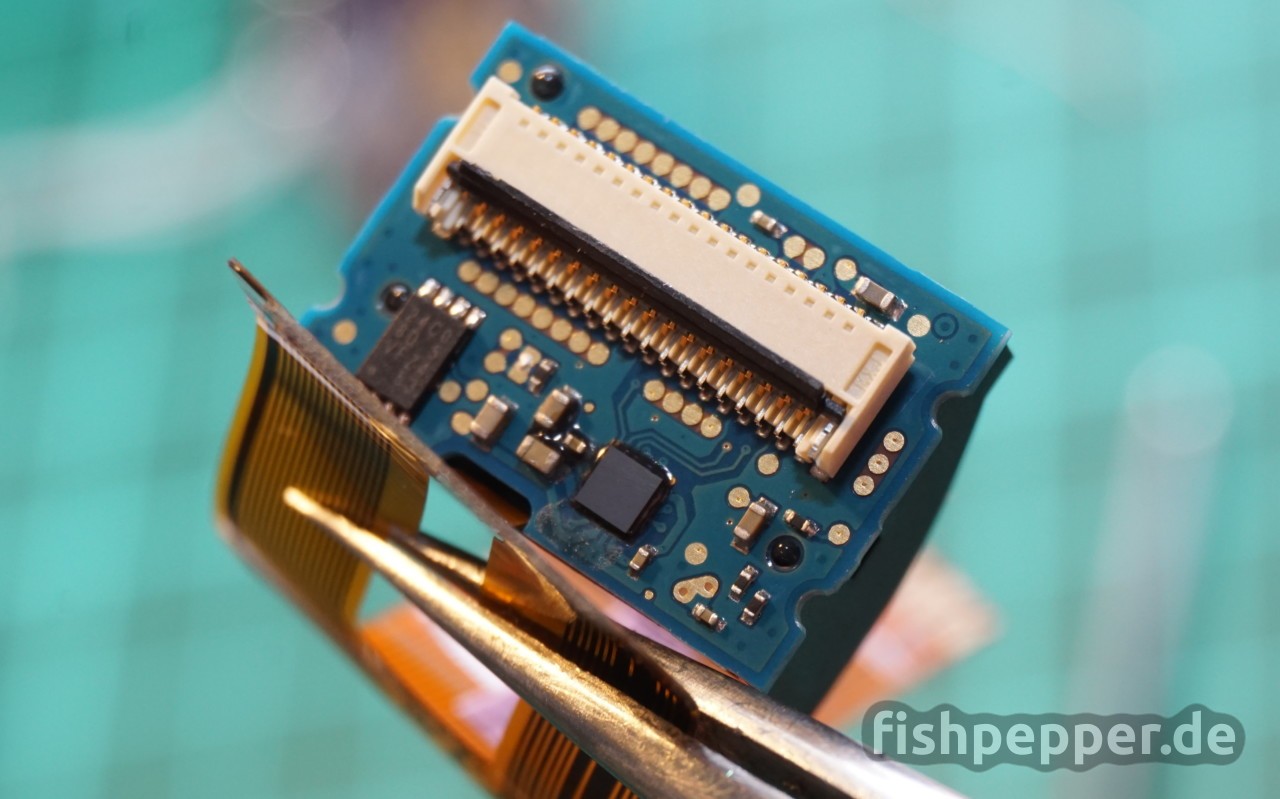
Back to (unfortunately) probably the worst part of this goggle: The display modules. Most (or all?) FPV goggle manufacturers seem to use screens made by kopin. The displays in the EV100 does not look like the modules I have seen before. They might be custom made for eachine. I did not disassemble them any further (yet) so I do not know if there are any markings hidden inside — time will tell 😉 UPDATE: This is most likely a SON-FL02-VGA.


That’s it for now. Further updates on my analysis will follow soon:
- Eachine EV100 component analysis: Display module supplier and technical data — UPDATE (12/3/2017)
- Eachine EV100: no audio problem — cause, fix, and technical background — UPDATE (10/24/2017)
- Eachine EV100: no audio problem — cause, fix, and technical background (10/20/2017)
- Eachine EV100 component analysis: Video receiver module identified — Sinopine SP338RX (10/12/2017)
- Eachine EV100: gray bar & distorted image problem — cause, fix, and technical background (10/11/2017)
- Eachine EV100 component analysis: Video decoder chipset identified — MST706 (9/27/2017)
- Eachine EV100 diversity: to be, or not to be, that is the question! (9/22/2017)
- Eachine EV100 component analysis: Display module supplier and technical data (9/20/2017)
- Eachine EV100 $99 FPV goggle — Disassembly, Components & PCB pictures (9/18/2017)
Nice analysis and writing fishpepper.
Looking forward to some more details around the EV100.
Cheers
Lars
I’ve read your the 3 articles about the ev100 you wrote, and that’s very interesting ! Thank you !
Now I’m gonna look at the rest of your past articles
As usual awesome posts ! Always look forward to seeing something new on your site.
As for making the FOV bigger, would putting a small fresnel lens in the sort of opening I see on the small screen box thing help ?
Would love to see some custom firmware on this thing 😀
Right now I have no idea how much this would help. Really a pity that the FOV is so bad 🙁
Thank you for void your warranty (instead of mine 😀 ).
FOV cam be somewhat enlarged cutting the sponge on the faceplate: cannot be converted to Skyzone FOV but become a bit better for sure.
Bye.
You’re killing it lately with your blog! Great articles! Great designs! Deep bows…
Thanks!