One might wonder why do I need this fancy new plug?! The reason is simple, the original TinyWhoop battery connectors are specified for a current of 1A. At least the original picoblade connector made by Molex — the Chinese clones are probably worse… A small micro brushless quad as my pepperF1SH can easily draw a current of 8A during full throttle periods. The “old” picoblade connector can not handle that much current, you will have a voltage drop of >0.1Volts!
So it makes absolutely sense to modify this to something better. As I am going to use this on my super light 1S pepperF1SH with an AUW of 32.4g, the new connector has to be light as well. The TinyWhoop folks have “invented” the new PowerWhoopConnector, don’t worry, it is nothing special. Just buy some JST PH 2.0 connectors (they are made by JST, see their product specs).
 Tools:

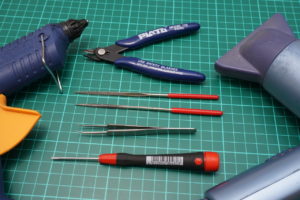
You do not need any fancy tools for this operation. Normal tools will do:
- a sharp wire cutter (that one really rocks, $2!)
- a small screwdriver and tweezers
- a square/triangle file from a diamont file set
- hot glue gun
- your wife’s hair dryer (don’t break it…)
Parts:
- a bunch of old lipo batteries (e.g. Turnigy nano-tech 200mAh)
- JST PH2 2pin wire harness
The Modification
Make sure to discharge the batteries before you proceed just in case something goes wrong along the way.
Before you start collect all the batteries you want to modify. You really want to have them all together at your working place and do them all in one pass. This is way more time efficient than doing them one by one.

Let’s start with the modification. Grab your wife’s hair dryer and heat up the black cap of the battery. Make sure NOT to heat up the silver/metallic looking part of the battery. This will damage the battery and it might lead to a thermal runaway or explosion.

Apply heat for some seconds and gently push the white battery connector. When heated up enough it is pretty easy to push it inside. If it does not move, apply heat for some more seconds.

You should be able to pull apart both parts now. If not, apply some more heat.

Once separated, peel away any remaining hot glue from the connector tabs and de-solder the wires. Now remove any hot glue from the black cap.

Take a square or triangle file and widen the hole in the black cap.

Do not remove too much material at once, do some test fits every now and then.

The connector should fit and stay inside the cap nicely. If you mess this up you will have to use more hot glue and it will not hold properly. Next, take one cable and cut the wires quite short as shown in the next picture. Make sure to use a really sharp wire cutter to remove the cable isolation. It takes some time to get it right, make sure to order enough spares.

Now it is time to solder the new connector to the battery. Use a soldering tip that is big enough for fast heat transfer as you really do not want to heat it up for a long time. This will damage the battery… Make sure to get plus and minus connected in the right way. WARNING: some of the pre-made JST cables you can buy use the wrong coloring scheme with black and red swapped, the one in the picture below is the correct one.

Now insert the connector into the prepared hole in the old cap. Do not push it in all the way yet.

Add some hot glue into the cavity and quickly slide on the cap. Make sure to pull on the white connector at the same time. This way the connector will be exposed at its full length.
When everything worked as expected you did not experience any LiPO explosions, no fire, and your outcome will probably look like this.
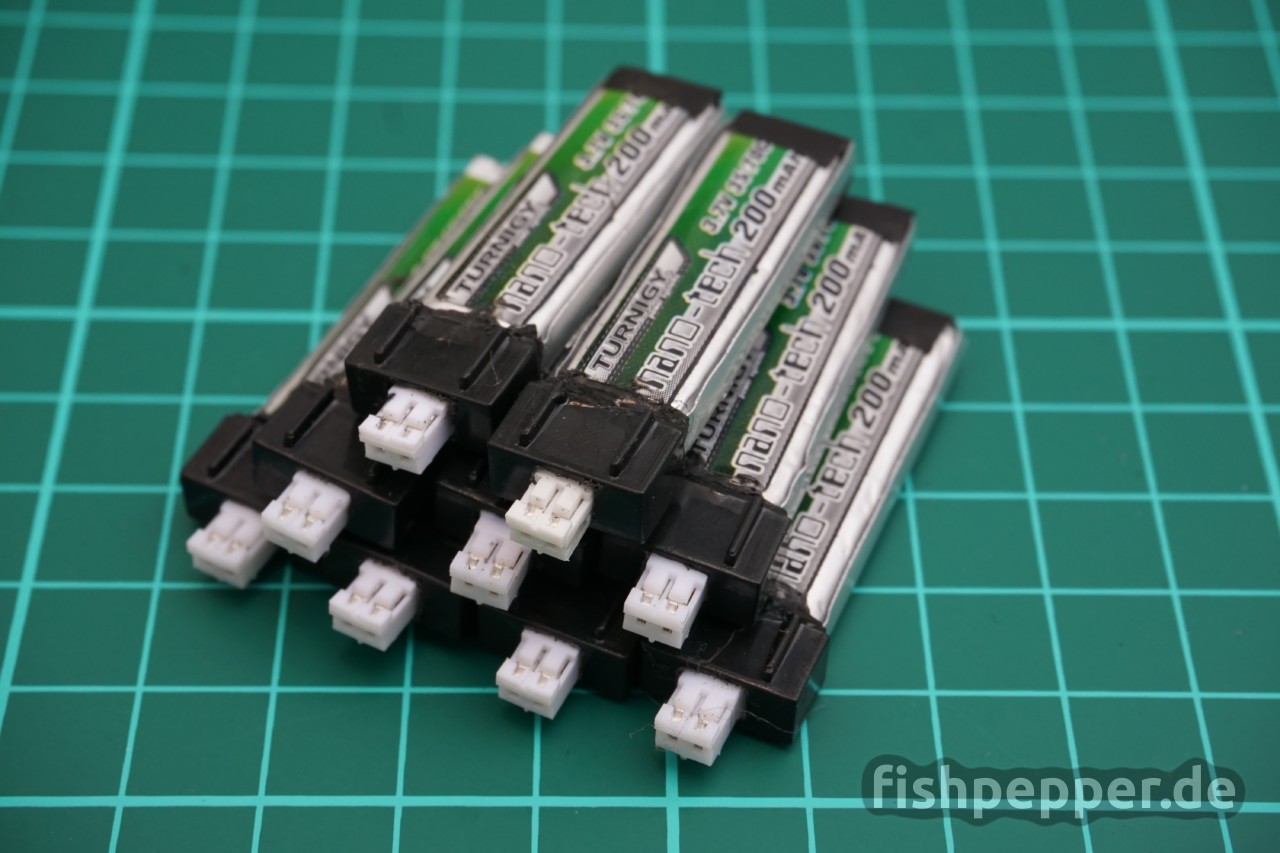
Enjoy your new, old batteries with 0.1Volts less voltage drop 😉
I did some voltage drop measurements on connectors. It was done at 2A for practical reasons, but probably scales to the 3-4A typical average current on a 65mm m/c. What I found was a per terminal drop of 0.12v on a JST PH 2.0mm (known as powerwhoop), and 0.05v on a Molex 51005/6 (micro-losi). Didn’t try a Molex picoblade 1.25mm (original tinywhoop) as it’ll probably be worse – less surface area. Double the drop for two terminals per battery. That is a lot of drop on a 3.7v battery, and a lot of local dissipation as well (heating of contact area). It will reduce the amount one can effectively discharge the battery.
It is also a lot more terminal resistance than the quoted specs. However the 51005/6 has a flat blade so the surface area is higher, so maybe not surprising it is better.
Makes me think that actually an improvement in runtime might come from putting flying leads on the batteries with 51005/6 connectors, or better still the JST RCY (the red JST 2.5mm connectors) as they are similar flat terminals, slightly wider.
yeah, those are really bad. Even the original ones… No wonder the cheap clones are so bad 🙁
GEEEEZ there are so many helpful tutorials on your website.
Keep up the good work, please.
Thanks, also, for posting a link to the cheap pre-crimped JST-PH connectors. I’ve been looking for a cheap supply but always give up when it’s going to cost like $20 for 10 sets.