 I recently bought some batteries with the PowerWhoopConnector. I do not get why do this renaming nonsense in the quadcopter scene. They call it “new plug”, “PWC”, or “MCPX” — why on earth not just call it by it’s name? This is the JST PH 2.0 connector (made by JST, see their product specs).
One might wonder why do I need another new plug?! The reason is simple, the original TinyWhoop battery connectors (Molex PicoBlade connector) are specified for 1A current. At least the original made by Molex. The Chinese clones are probably worse… A small micro brushless quad as my pepperF1SH can easily draw a current of 8A during full throttle periodes. The “old” PicoBlade connector can not handle that much current, you will have a voltage drop of >0.1Volts!
This is the reason why I am switching to the “new” JST PH2 connector. My new 4-in-1 charger supports this connector without any modifications. In addition, I would also like to be able serial balance charge a set of batteries. Here is a short Tutorial on how to build a 4S serial charge cable for the new batteries.
Parts:
- Four JST PH2 2-pin male connectors
- JST PH2 5-pin balancer plug cable (recycle them from an old 4S LiPo!)
- Some 22-24AWG silicon wire
- A charge plug compatible to your charger or two 5mm banana plugs
Tools:
- Soldering Iron
- Wire cutter
- Heat shrink
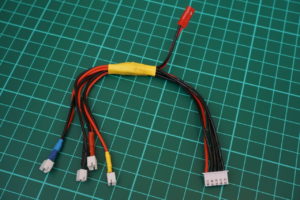
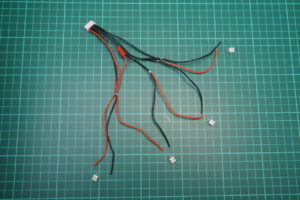
The cable can be made within half an hour. Star by cutting four red and four black wires (~8cm will do). Solder them to the 5-pin balancing cable as shown in the picture and add your charge input plug or two banana plugs.
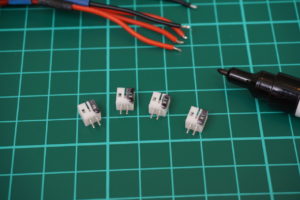
It might be a good idea to mark the minus side of the connectors you are going to solder next. Take a black sharpie and mark the minus side as shown here:
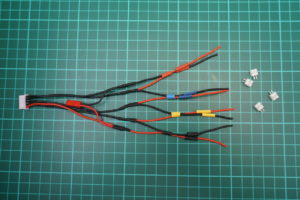
Now grab some heat shrink and isolate the solder joints. Add some more colored heat shrink to mark the single pairs that will be connected to the single connectors. Make sure to have the ordering and the pairs exactly as shown in this picture.
You are almost done. Slide some big heat shrink over the cables (see below) and finish the cable by soldering the connectors to the colored cable pairs. When done, your work should look similar to this:
Done. Enjoy your new cable!


