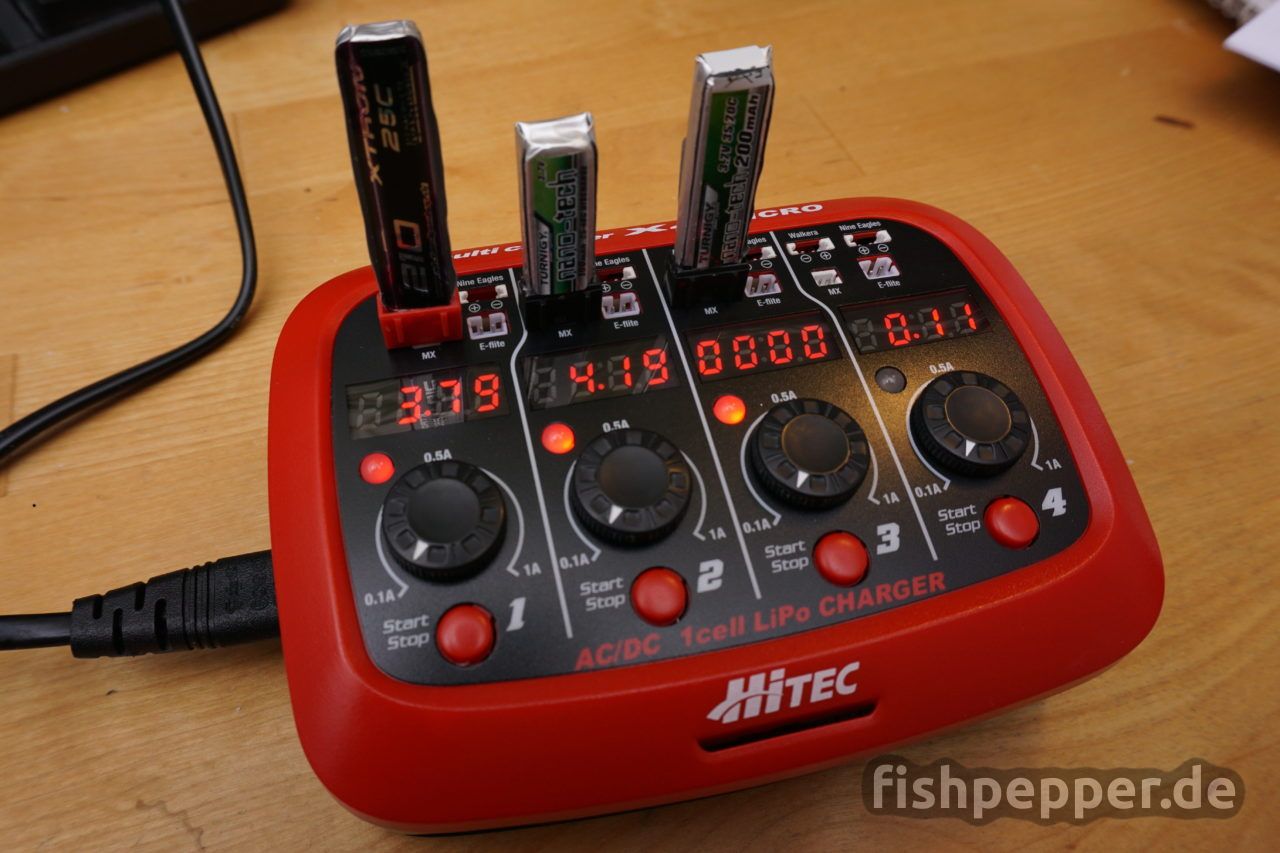
I recently bought a SkyRC quattro / Hitec X4 charger for my TinyWhoop and pepperF1SH batteries. Unfortunately this charger does not have the 1.25mm molex picoblade connector you find on the standard picoblade connector used on the TinyWhoop batteries. The MX connector is a close fit, but having a different spacing (1.5mm VS 1.25mm) damages your batteries connector after some use. Therefore you should NOT connect the batteries directly to this connector. You will have to use an adapter cable…. great 🙁
Time to void warranty!
Adapter cables suck — So here is the plan: Remove those stinkin’ 1.5mm connectors and solder some high quality molex picoblade plugs to their location!
Please note: My standard disclaimer applies to this project as well, I am not responsible for any injuries and/or damage caused by this modification. Do it at your own risk! This mod should only be done by a professional.
Tools/Parts needed:
- 4 molex picoblade connectors (get the 2-pin angled version, it has longer pins)
- soldering iron with enough heat (80W / 350°C should do)
- solder wire, desoldering wick, and some flux
- manual desoldering pump
- screwdriver (PH2)
- plastic card
The first step is to remove the four rubber feet in order to remove all five screws on the back:

Next, open up the case. You might use any an old plastic card to disengage the plastic retainer clips:

Once done, carefully bend/separate the two halves to get access to the chargeplug PCB and remove the three black screws and put the white plastic aside:

Before we continue, unplug the four red/black charge cables and remove the four (3+1) black screws on the charge plug PCBs:
The charge plug PCB consists of two connected PCBs. Remove the whole unit:

Now plug in a not too fine tip and fire up your soldering iron to 350°C. Desolder the four 1.5mm plugs labeled as MX on the chargers panel (make sure to double check that — you do not want to desolder the wrong ones…). Keep the small spacer pcb connected to the original connectors. You might need to apply some heat, sometimes they are fixed by solder.

Done? Fine. Now comes the important step: Use the solder wick and/or the desoldering pump to remove the solder from the holes. You can apply some flux to have a better separation. Double check that there is no short circuit. Especially the top (as shown in my picture above) tends to build up bridges!
Now it is time to prepare the picoblade connectors. I used the angled ones as they have longer leads. Just snap off the side plastic and bend the legs one by one to be straight:


![]()
Double check the orientation and insert them into the charge plug PCB as shown in the next picture. Add some flux and solder them to the PCB. Use your free hand to adjust the angle, you want to have them in a straight line:

The next step might sound unnecessary for a keen soldering hero — but please do it anyway: Take a multimeter and double check that there is no short circuit on the new connector. The easiest way is to measure at the red/black charge leads. You should measure no connection between red and black (>100kOhm). Repeat for all four leads. I was unlucky on my first try, I got a solder bridge between the spacer PCB and the main board! So if you measure a short circuit, remove the connector and clean up the mess in between.
You are almost done! Take the finished PCB and push it gently into the case. You might have to use some pliers to guide the connectors into their openings. Fixate the PCB using the four short screws you removed before (three on the lower, one on the upper center hole). Do not forget to re-plug in the connector cables:

Almost done! At this point there is not much that can go — yay. Add the white plastic and insert the three screws:
Join both case parts and fixate it with the five bottom screws. Make sure not to overtighten them.
And now: Enjoy hassle free charging!