NOTE: This version is outdated, it refers to tag v0.1. There is a newer release (v0.2), please have a look at the corresponding post here.
In this post I am going to share all the parts you need to build your own super lightweight tinyFISH flight controller with an integrated, FrSky compatible rx. All the following information applies to the current version of tinyFISH (tagged as revision 0.1).
Circuit board
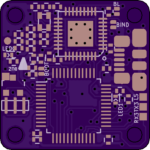
 The PCB was designed to accommodate all the features I wanted in the smallest form factor possible. The outer dimensions are 20x20mm with a hole-to-hole distance of 16mm (M2). When manufactured in 0.8mm FR4 the completely assembled board weights silly 1.7 grams. This was only possibly by using small components, manual placement, and several tries on routing. The final resul, tightly packed with 0402 sized components, require some good experience with soldering SMD components.
BOM
You can find a table with part references and ordering numbers on a separate page. Please make sure to use high-Q high frequency parts for the hf section around the CC2510 chip as noted in the list. I ordered the majority of the parts from Farnell but you can probably get most of the parts at any electronic component vendor. Make sure to buy the MPU6000 from a reputable seller, I got some bad quality (fake?) chips from aliexpress…
Design files
The design files are released under the CERN open hardware license v1.2. Before using the design files for commercial projects please make sure that you read and understand this license! You can use the files for your projects, just make sure to give proper credit (by e.g. linking to the tinyFISH FC page). Additionally release all modifications you do and all work you derivate from this under the same license.
You can find the design in the kicad file format on my github repository. You will need a recent version from kicad. I compiled my own binaries from kicad commit efdfaeb.
Placement & Connections
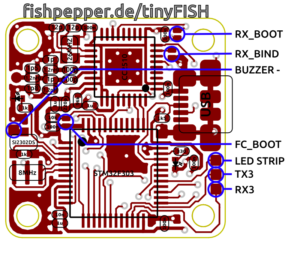
You can use the following diagrams for the component placement. See my github repository for the full resolution files in SVG format.
In addition to the part placement, those diagrams do also show you how to connect the various signals to this fc. The pads labeled CC_* are the ISP connection for the CC2510 and are used to flash the initial CC2510 bootloader.
Do it!
Now it is time to build your own! This page has all the information you need to build your own tinyFISH flight controller. Sure, this required very fine pitch soldering, but if you have some experience with SMD soldering give it a try! If this sounds to complicated to you, do not worry, I am quite sure someone will pick this design up and sell it sooner or later.
If you have built any my stuff i would be happy to see and hear how it turned out for you — send me an email!


